How do I print requisitions? (Forms)
Learn how to use the Requisitions report to print requisitions.
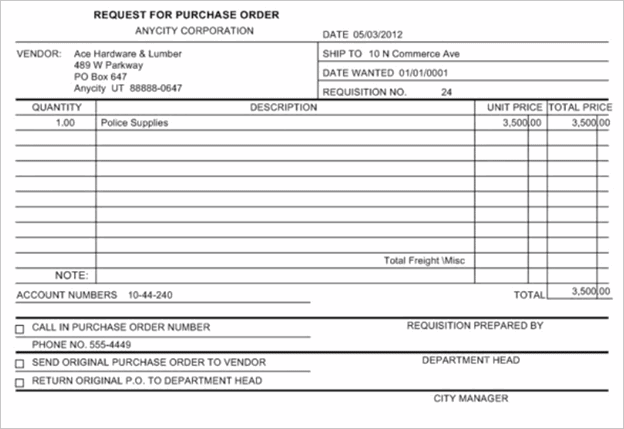
Use this report to print requisitions to plain paper or a pre-printed form. You can set up the report to select requisitions by requisition number, input date, created date, department, and so on.

Sample purchase order
Printing requisitions
1. Open Connect Accounts Payable > Reports > Requisitions.
2. Select a report title.
3. Click the Forms tab.
Before you can print requisitions you will need to set up a Requisition form. This is a form, created using the Forms Designer, that tells the report what information to include on the requisition form and where you want to print it.
How do I add a requisition form? Use Connect Accounts Payable > Organization > Forms to add a new purchase order form. Or, use the Forms tab if you are running a report to click the Edit button that is located at the end of the Form field.
4. Select the Form.
The form is the form layout the report will use to print requisitions.
5. Load the printer.
Will you print requisitions to plain paper?
Yes, I will print requisitions to plain paper. Continue to the next step.
No, I will print requisitions to a pre-printed form. Load the paper stock in the printer. Then, move on to the next step.
6. Set up the form options.
7. Click Print (CTRL+P).
The report prints.
2019.05
Printing a specific requisition number
Use the Selection Criteria so the value assigned to the Requisition.Requisition Number column is the requisition number.

Value field
To change the Requisition.Requisition Number value, double-click the current value assigned to the column. It's usually ALL. Use the Values form to enter the requisition number and click OK. Connect will only print a requisition for the selected requisition number.
Printing requisitions for a specific date
Add a date column to the Selection Criteria, and then set the value to a specific date. For example, you can print requisitions by the created by date (Requisition Detail.Created Date) or input date (Requisition Detail.Input Date).
To add a date column to the Selection Criteria, double-click the column heading titled Column.

Column header
Use the Selection form to find and select Requisition Detail.Input Date or Requisition Detail.Created Date.

Selection form
Click Select to move the column to the Selected Selection Criteria Fields list. Next, click OK. Connect adds the column to the Selection Criteria.

New field included in the Selection Criteria
Last, double-click the value assigned to the Requisition Detail.Input Date or Requisition Detail.Created Date to enter the date. Connect will print requisitions for requisitions with dates that match the Selection Criteria.
Related Topics
How do I save a requisition as a PDF?
Copyright © 2025 Caselle, Incorporated. All rights reserved.