How do I work with documents?
Documents
In this Topic
Watch a video
Updated 26Apr2018
Viewing documents
Open a document to view it in the viewing pane. View documents, add comments, create alerts, and review the retention policy and security profile (2m51s).
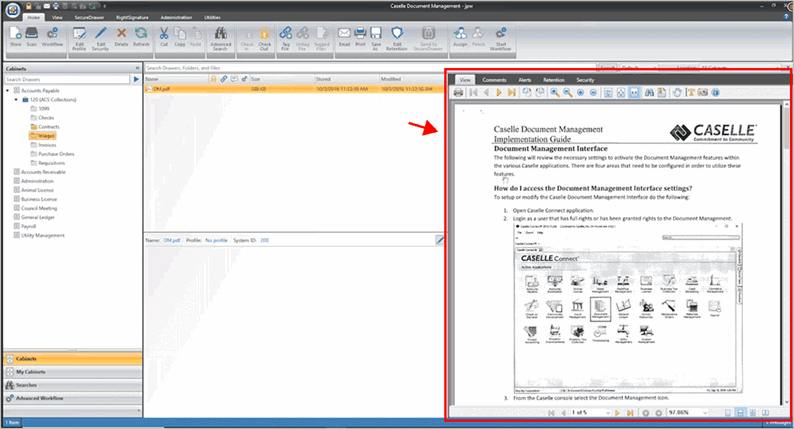
Viewing pane
Printing
Click Print to print a document.

Print button
Updated 26Apr2018
Zooming in/out
Make the document text larger or smaller. Change the page viewing options to fit page, fit page to viewing area, or fit page width.

Zoom buttons
Updated 26Apr2018
Searching content
Find a word or phrase or amount in the document.

Search buttons
Updated 26Apr2018
Adding comments
To add a comment, click the Comments tab and then type in a comment in the Add New Comment field. When you're done, click the Add button. The comment will include a timestamp and user name.
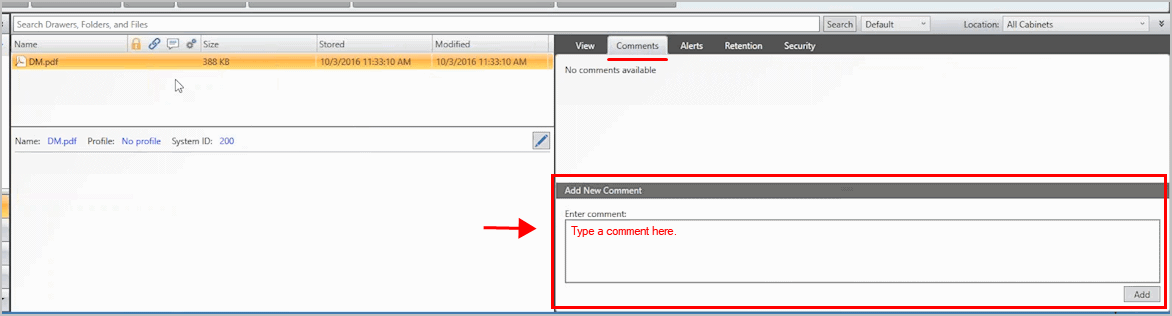
Add New Comment
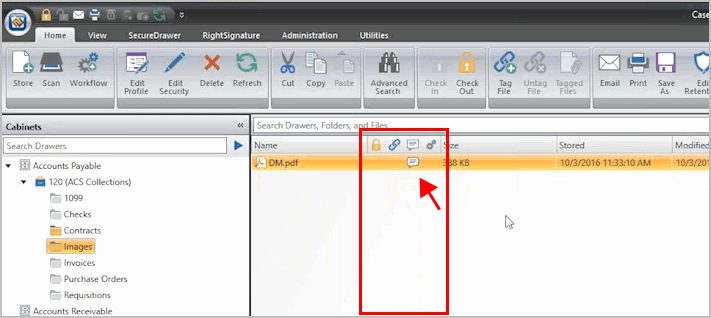
You can tell if there's a comment because an icon, it looks like a speech bubble, will display in this column.
Document properties
You can add as many comments as you like. The comments are displayed by date with the most recent comment listed at the top.
Updated 26Apr2018
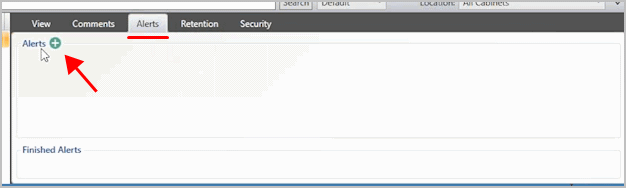
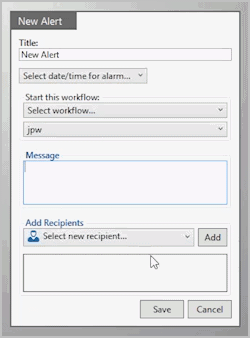
Creating alerts
If a document has a due date, you can set up an alert and assign it to a user. You can also send the alert to more than one user.
To add an alert, click the Alerts tab and then click Alerts +.
Alerts + button
The New Alert form displays.
New Alert
Set up the alert and then click Save.
Updated 26Apr2018
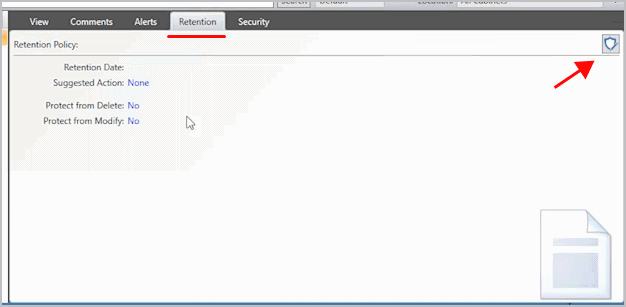
Setting retention settings on a document
You can set retention settings on cabinet but you can also set retention settings on a document. The document's retention settings will override the retention settings on the cabinet.
To set the document retention settings, click the Retention tab and then click the Shield (it's in the upper-right corner).
Shield button
The Edit Retention form displays.

Edit Retention
Click to select the checkbox titled Enable Retention and then fill in the rest of the form. Remember, the document retention settings will override the cabinet retention settings. Click OK to save your changes.
Updated 26Apr2018
Reviewing security profile on a document
A document will inherit the security profile that is assigned to a cabinet. When you view the security settings on a document, you can see which users have access to the document. To grant or revoke access, you need to modify the user's security profile. See the help topic titled How do I set up my user name and password?
Updated 26Apr2018
Storing documents
You can store documents that are saved on your PC using the Windows Explorer or Document Management.
Watch a video: Storing documents in Document Management (2m10s).
Using Windows Explorer to add documents
1. Use the navigation pane in Document Management to locate the cabinet, drawer, or folder where you want to use to store the document.
2. Next, use Windows Explorer to find the document on your PC. Click to select the document and then drag and drop it into Document Management.
A dialog box will prompt you to enter the document name and properties (if required).

Store documents dialog box
3. Click the Save button.
The document is saved in Document Management.
Updated 27Apr2018
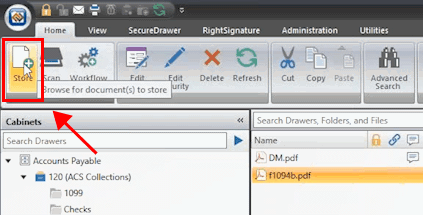
Using Document Management to add documents
1. Click Store.
Store button
The Select Files to Store dialog box displays.
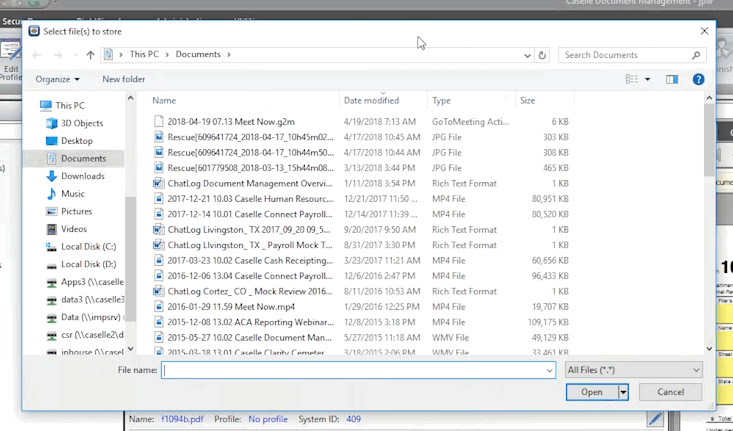
Select Files to Store
2. Navigate to the file and then click Open.
The Caselle Document Manager Store Document dialog box displays.

Caselle Document Management Store Document
3. Select the file destination, verify the document name and profile, and then click Store.
The document is saved in Document Management.
Updated 27Apr2018
Scanning documents
After you scan a document, you may need to log out and then log in to refresh the view. You can drag and drop scanned documents to move them to a different location. You can also scan multiple documents and Document Management will prompt you to select where you want to store each scanned document.
Watch a video: Scanning a document, setting up scanner, and store scanned documents (4m6s).
Important! The scanner must have a TWAIN driver. Contact your IT admin for assistance.
Scanning and storing a document
1. Open Connect Document Management.
You can also launch the Document Management Scanner by clicking the Document Management Scanner icon on your Desktop.
2. Click Scan.
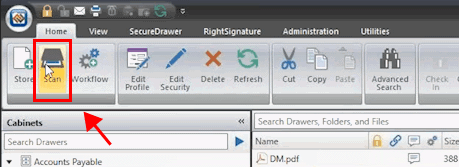
Scan button
The Document Management scanner launches.
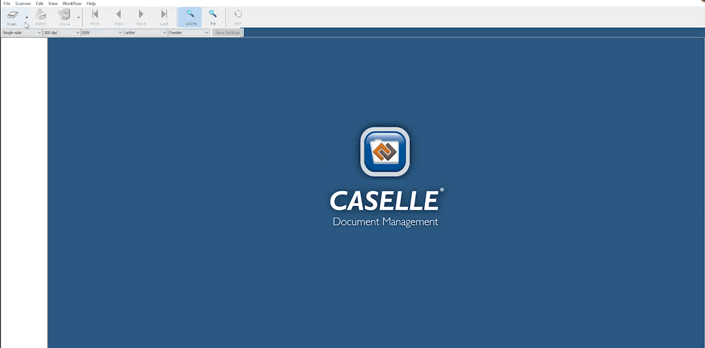
Document Management Scanner
3. Click the Scan button on the Document Management Scanner app.
It scans the documents in the scanner. The scanned documents display in the Document Management Scanner app.

Document Management Scanner app
You can rotate the page orientation to save the document orientation. Clicking the 90 button will rotate the document 90 degrees to the right. Keep clicking the 90 button until the document orientation is correct.
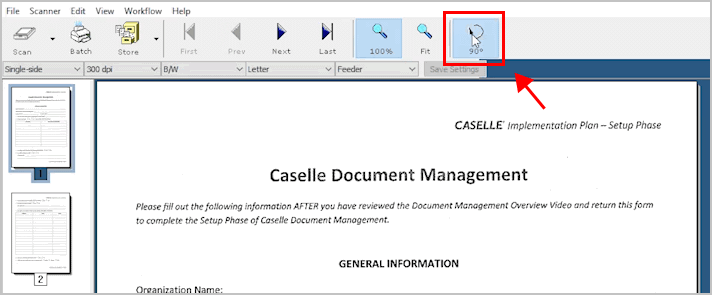
90 degree button
4. Use the navigation pane on the left to select the thumbnails of the documents that you want to store.
You can select more than one thumbnail by pressing and holding the CTRL key on the keyboard.

Navigation pane with thumbnails of scanned documents
5. Click Store.
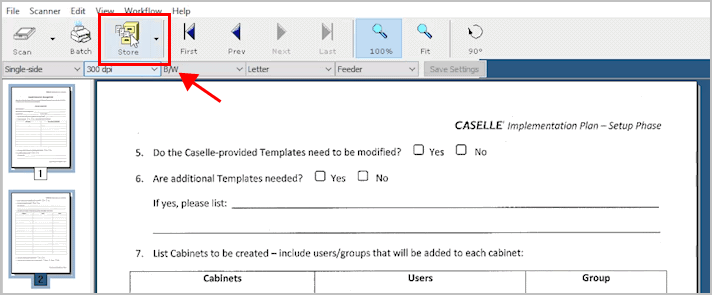
Store button
The Store Pages dialog box displays.

Store Pages
6. Set up the Store Pages options.
You may scan multiple pages at a time. This dialog box allows you to determine which pages belong to the same document. For example, you can scan a stack of documents and then store the scanned documents in different locations in Document Management.
What do you want to do?
If you have selected the scanned documents from the navigation pane in Step 4, select Store Selected Pages Only and click OK.
If you want to store all of the scanned documents, select Store ALL Pages and click OK.
7. Select Caselle Document Management as the Printer and then click OK.
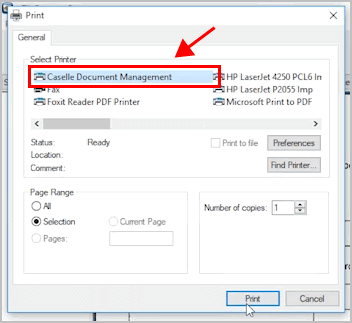
Caselle Document Management Printer
8. Choose the scanned document destination.
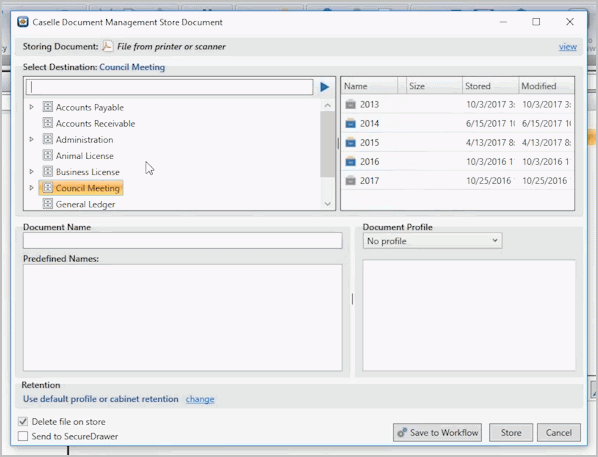
Caselle Document Management Store Document
9. Click Store.
The scanned document is stored in Document Management.
Updated 27Apr2018
Copyright © 2020 Caselle, Incorporated. All rights reserved.